Using tensioning strap -T10038- and locating pins -T10486-, this page covers removing the 4MOTION Volkswagen Golf Mk7 multi-link rear axle subframe with attachments.
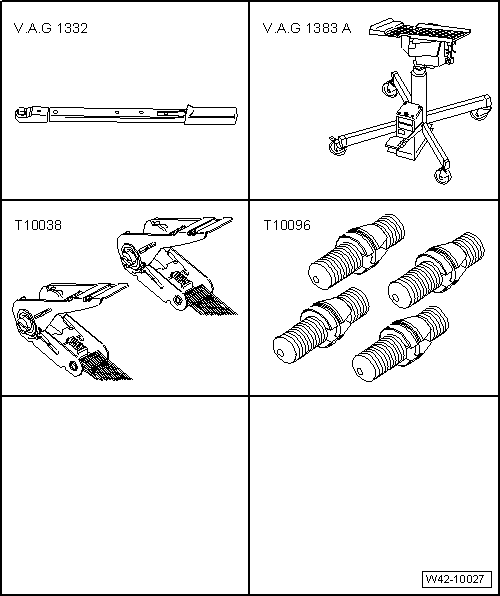
| Special tools and workshop equipment required |
| Torque wrench -V.A.G 1332- |
| Engine and gearbox jack -V.A.G 1383 A- |
| Tensioning strap -T10038- |
| Removing subframe with attachments |
|
|
|
| – |
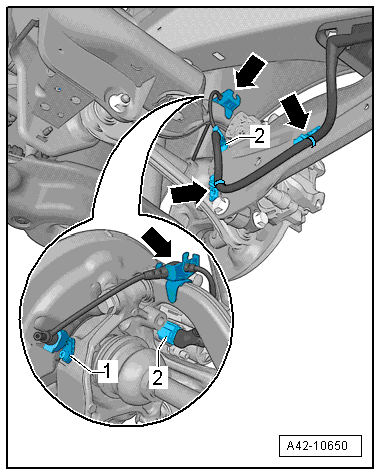
Unplug electrical connector -1-
from ABS speed sensor on both sides and move clear. |
| – |
Unplug electrical connector -2-
from electromechanical parking brake motor on brake caliper on
both sides. |
| – |
Detach electrical wiring harness from retainers
-arrows- and move clear. |
| Vehicles with vehicle level sender |
|
|
|
| – |
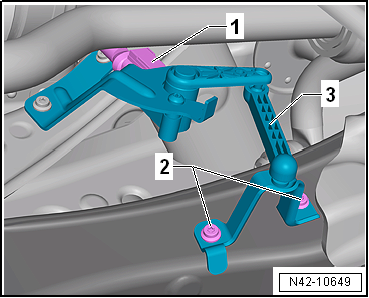
Disconnect connector -1-. |
| – |
Take rear left vehicle level sender -G76--3-
off transverse link. |
| Continuation for all vehicles |
| – |
Remove springs
→ Chapter. |
|
|
|
| – |
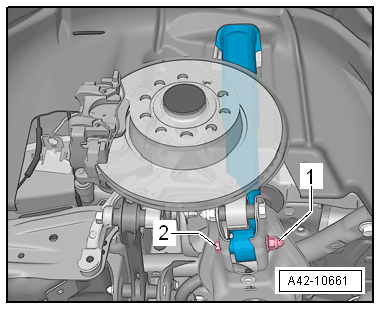
Unscrew nut -1- and remove bolt
-2-. |
|
|
|
| – |
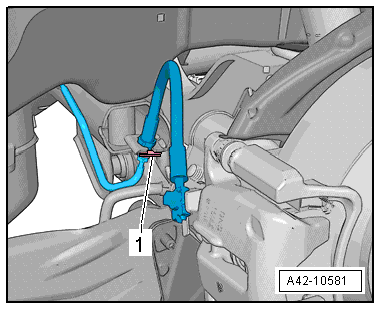
Pull out retaining clip -1- on
both sides of vehicle. |
| – |
Free brake lines from holder. |
 Note Note
| – |
Disconnect propshaft from rear final drive, and secure it
→ Rep. gr.39. |
| – |
Remove brake calipers on both sides and tie to body with
brake lines connected
→ Brake system; Rep. gr.46. |
| – |
Remove rear silencer of exhaust system
→ Rep. gr.26. |
|
|
|
| – |
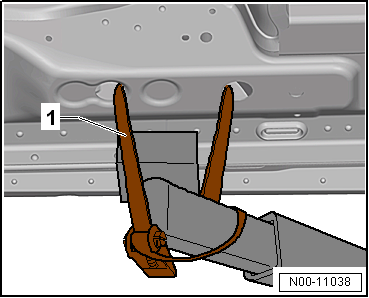
Use tensioning straps -T10038--1-
to strap vehicle to support beams of lifting platform on both
sides. |
 WARNING
| If the vehicle is not strapped down, there is a
great danger that the vehicle will slip off the lifting
platform! |
|
| – |
Fix position of subframe
→ Chapter. |
| – |
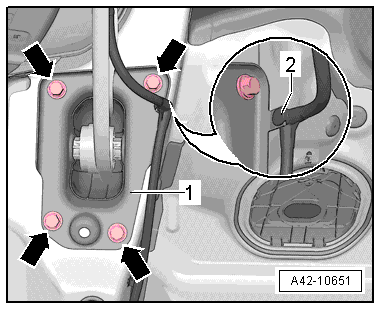
Unclip electrical wire -2- on
mounting bracket -1- and move
clear. |
| – |
Mark installation position of mounting bracket
-1- on body. |
|
|
|
| – |
Carefully lower subframe with attachments about 20 mm. |
| – |
Disconnect connector on Haldex coupling above final drive. |
| – |
Carefully lower subframe with attachments 30 mm further. |
Note
| When lowering components, make sure there is enough
clearance for brake lines, electrical wiring and propshaft
centring pin. |
|
|
|
| – |
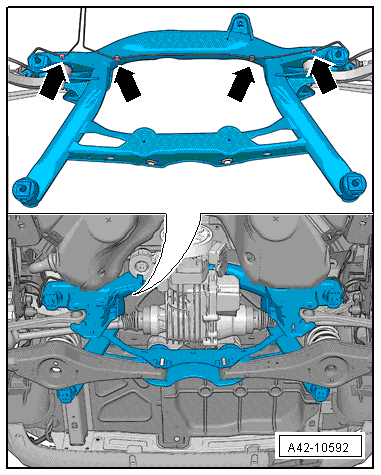
Unclip brake lines from clips on both sides
-arrows-. |
Note
| The clips will be destroyed and must be renewed. |
| For reasons of clarity, the illustration shows the subframe
from above in removed state. |
| – |
Carefully lower subframe with attachments. |
Note
| When lowering, ensure sufficient clearance to brake lines,
electrical cables and centring pin to propshaft. |
| Installing subframe with attachments |
| Install in reverse order of removal, observing the
following: |
| → Chapter „Assembly overview - subframe, multi-link suspension,
four-wheel drive“ |
| → Chapter „Assembly overview - trailing arm“ |
| → Chapter „Assembly overview - suspension strut, shock absorber,
spring, multi-link suspension“ |
| → Chapter „Assembly overview - rear vehicle level senders,
multi-link suspension, front-wheel drive“ |
| → Chapter „Torque settings for wheel bolts“ |
| Bolts for brake caliper and brake disc
→ Brake system; Rep. gr.46 |
| Exhaust pipes double clamp
→ Rep. gr.26. |
| On vehicles with vehicle level sender, carry out basic
settings for wheel damper electronics → Vehicle
diagnostic tester |
| On vehicles with vehicle level sender, carry out basic
adjustment of headlights
→ Electrical system; Rep. gr.94. |
| – |
When does wheel alignment have to be checked
→ Chapter? |
|
|
|
Questions & answers
Removing and installing rear axle, multi-link suspension, four-wheel drive — Volkswagen Golf Mk7
How do I remove the Golf Mk7 4MOTION rear multi-link axle?
Disconnect prop shaft and rear diff in addition to standard multi-link removal steps.
Special tools and workshop equipment required
Torque wrench -V.A.G 1332-
Engine and gearbox jack -V.A.G 1383 A-
Tensioning strap -T10038 ...
Other materials:
- Lowering rear axle, multi-link suspension, front-wheel drive, e-Golf
- Lowering rear axle, multi-link suspension, four-wheel drive
- Removing and installing rear axle, multi-link suspension, front-wheel drive, Golf GTE
- Removing and installing rear axle, torsion beam axle
- Overview - rear axle, multi-link suspension, four-wheel drive

 Removing and installing rear axle, multi-link suspension, front-wheel drive,
Golf GTE
Removing and installing rear axle, multi-link suspension, front-wheel drive,
Golf GTE Axle beam