| Special tools and workshop equipment
required |
|
|
|
| |
|
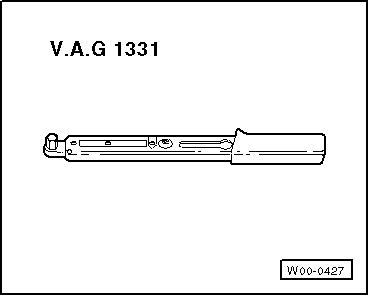
Torque wrench -V.A.G 1331- |
| |
|
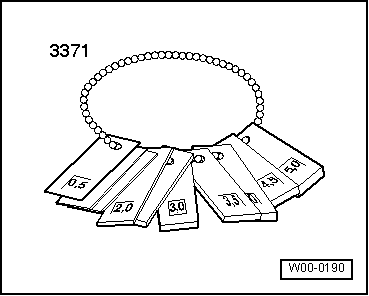
Setting gauge -3371- |
 Note
Note
- Vehicle must be standing on its wheels to enable rear lid to be
adjusted
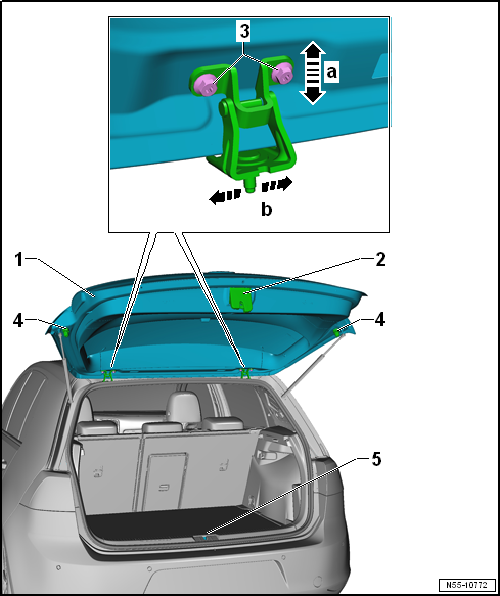
- The rear lid lock -2- is bolted directly
to the rear lid -1-. The rear lid lock cannot
be adjusted
- The adjustment buffers -4- on the left
and right are not a means of adjustment. They have the function of
stabilising and damping the rear lid.
- The rear lid is correctly adjusted when all shut lines are even when
closed. it is not protruding too far inwards or outwards, and when the
contours are flush with each other.
- The rear lid must engage in the striker plate without excessive force
being applied
| Use the setting gauge -3371-
→ Rep. gr.00 to check or set the gap dimensions. |
| – |
Loosen striker pin -5- and adjust after
adjustment of hinges and adjustment buffers
→ Anchor. |
| – |
By loosening bolts -3- on left and
right, it is possible to adjust rear lid -1-
in oversized holes of hinge -arrows a- and
-b-. |
| – |
After completing adjustments, perform corrosion protection measures
on hinge and bolts -3-. |
| – |
Adjust adjustment buffer. |
- Bolts
→ Chapter „Assembly overview - rear lid“
| Adjusting adjustment buffer |
|
|
|
Note
| If necessary, renew adjusting buffer
→ Anchor. |
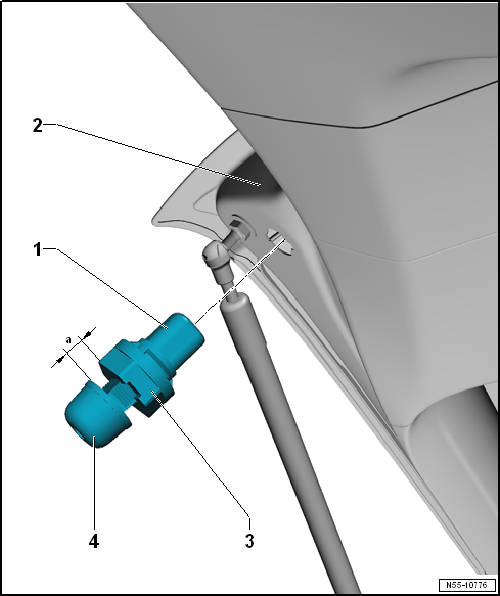
| – |
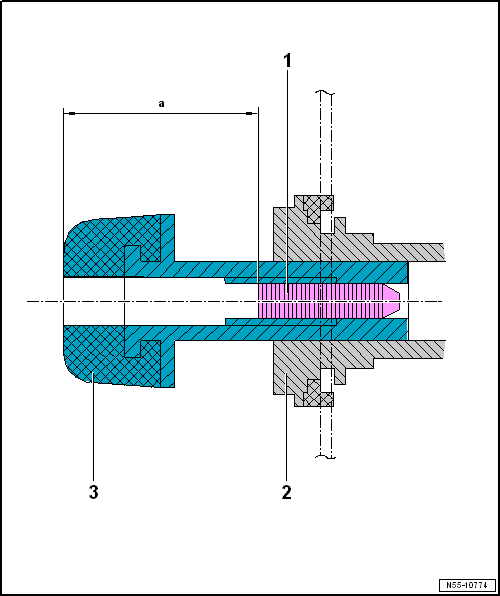
Loosen clamping bolt -4- until it is
visible in rubber buffer. |
| – |
Pull detent slide -3- out of adjusting
buffer -1-. |
| – |
Adjust detent slide to dimension -a- =
12.5 mm. |
| – |
Close rear lid in preliminary detent position with slight pressure
in the middle. |
| – |
Screw in clamping screw -1- of
adjustment buffer -2- to a depth of
-a - = 20 mm. |
|
|
|
| – |
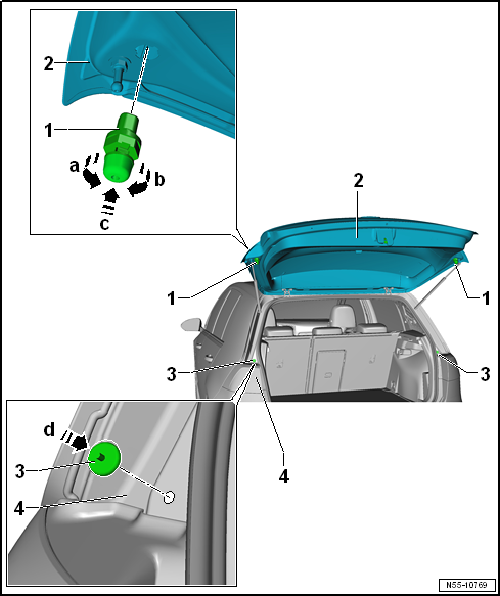
To remove adjustment buffer, turn entire buffer
-1- through 90°
-arrow a-. |
| – |
Remove buffer from rear lid -3-. |
| – |
Carefully check that stop -3- is
correctly seated in side panel -4-. |
| – |
To install, insert entire buffer -1- at
right-angle into rear lid -arrow c-. |
| – |
Turn buffer -1- through 90°
-arrow b-. |
| – |
Adjust buffers -1-
→ Anchor. |
| Special tools and workshop equipment
required |
|
|
|
| |
|
Torque wrench -V.A.G 1331- |
Note
| |
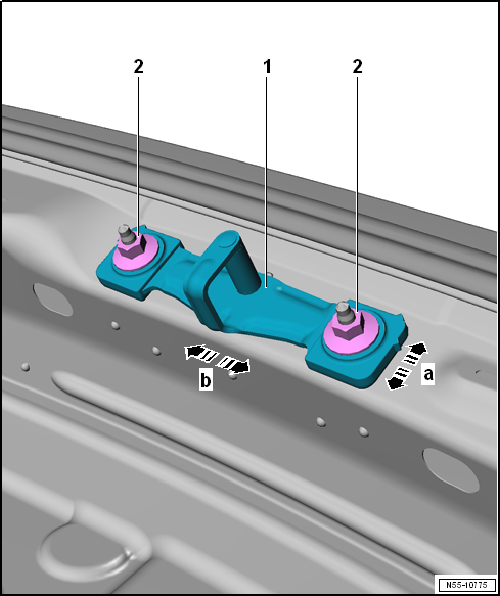
- If hexagon nuts are loosened -2-,
it is possible to adjust striker pin -1-
in the oversized holes of hinge -arrow a-
and -arrow b-.
|
| |
- Adjust striker pin -1- so that
the recess of the rear lid lock with rotary latch is centred
-1- relative to the striker pin when it
engages.
|
| – |
Remove trim for rear lid lock
→ General body repairs, interior; Rep. gr.70. |
| – |
Loosen hexagon nuts -2-. |
| – |
Move striker pin -1- into upper
position and tighten hexagon nuts -2-. |
| – |
Close rear lid and make sure adjustment has been carried out
correctly. |
| |
Hexagon nut
→ Chapter „Assembly overview - rear lid“ |
Questions & answers
Adjusting rear lid — Volkswagen Golf Mk7
How do I adjust the Golf Mk7 tailgate alignment?
The car must be on its wheels. Loosen the hinge bolts, use setting gauge -3371- for positioning, adjust the gap and flush, then tighten to the specified torque. The lock striker can be adjusted laterally.
What special tool is needed to adjust the Golf Mk7 rear lid?
Setting gauge -3371- is used for positioning the tailgate correctly relative to the body aperture. Standard VW torque wrenches are also required.
Special tools and workshop equipment
required
Removing
Torque wre ...
Special tools and workshop equipment
required
Removing
Torque wrench ...


