| – |
Remove front seat
→ Chapter. |
| – |
Secure front seat on seat repair stand
→ Chapter. |
| – |
Move front seat to highest position. |
| – |
Remove seat trim on tunnel side
→ Chapter. |
| – |
Turn adjustment knob of backrest adjustment towards front as
far as stop. |
|
|
|
| – |
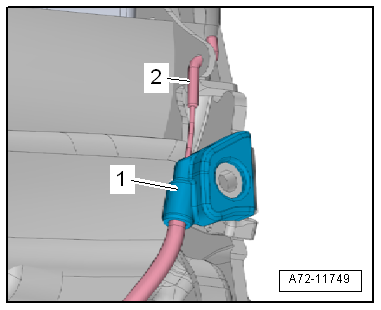
Unclip cable support bracket -1-
of Bowden cable A from backrest. |
| – |
Detach Bowden cable A -2- from
fitting on backrest. |
|
|
|
| – |
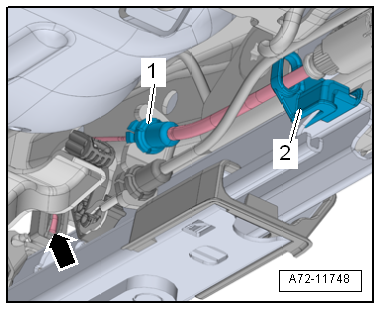
Detach cable support bracket -1-
of Bowden cable A from retainer for entry assistance on seat
pan. |
| – |
Unclip retainer -2- for Bowden
cable from seat pan. |
| – |
Detach Bowden cable A on seat longitudinal adjustment
-arrow- and remove it. |
| Install in reverse order, but note the following: |
| – |
Adjust Bowden cable A
→ Chapter. |
| |
→ Chapter „Assembly overview - front seat“ |
|
|
|
Questions & answers
Removing and installing easy-entry Bowden cable A — Volkswagen Golf Mk7
How do I remove the Golf Mk7 easy-entry Bowden cable A?
Remove the seat and mount on repair stand. Move to highest position, remove seat covers and disconnect the cable from both mounting points.
WARNING
Ensure backrest is locked in position (default
position), otherwise it can tilt forwards in an
uncontrolle ...
Special tools and workshop equipment
required
Feeler gauges -VAS 5301/10-
Adjusting conditions
...


