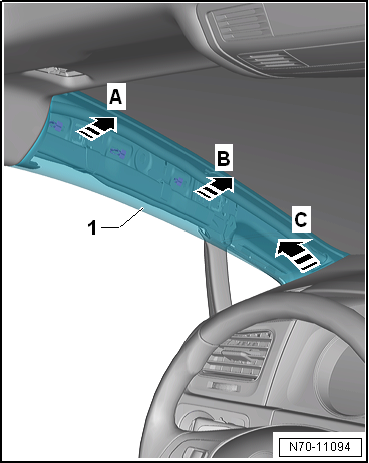
Using removal wedge -3409- and torque wrench -V.A.G 1783-, this page covers removing the Volkswagen Golf Mk7 upper A-pillar trim on the left side (right is similar).
| Special tools and workshop equipment
required |
|
|
|
| |
|
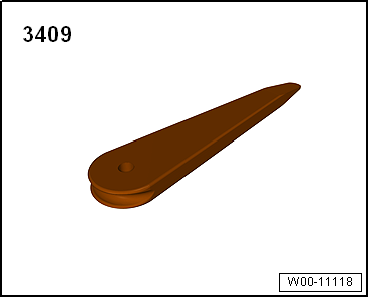
Removal wedge -3409 |
| |
|
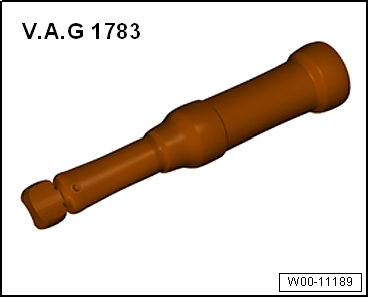
Torque wrench -V.A.G 1783 |
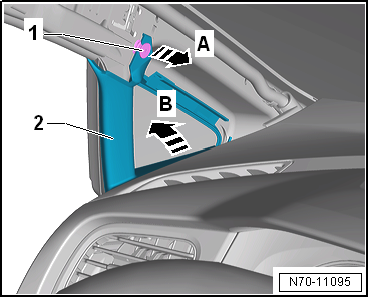
| Remove trim for triangular window. |
 Note Note
| Removal and installation are described for the left vehicle
side. Follow same instructions for the right side as
appropriate. |
| – |
Remove upper A-pillar trim
→ Anchor. |
| – |
Remove A-pillar gap cover
→ Chapter. |
| – |
Release trim for triangular window -2-
with clip -1- in
-direction of arrow A- from body
mounting. |
| – |
Pull trim for triangular window -2-
with clip -1- upwards out of dash
panel -arrow B-. |
|
|
|
| Removing lower A-pillar trim on driver side, LHD vehicles |
| – |
Release sill panel moulding from body in area of overlap to lower
trim of A-pillar
→ Chapter. |
| – |
Remove A-pillar gap cover
→ Chapter. |
| – |
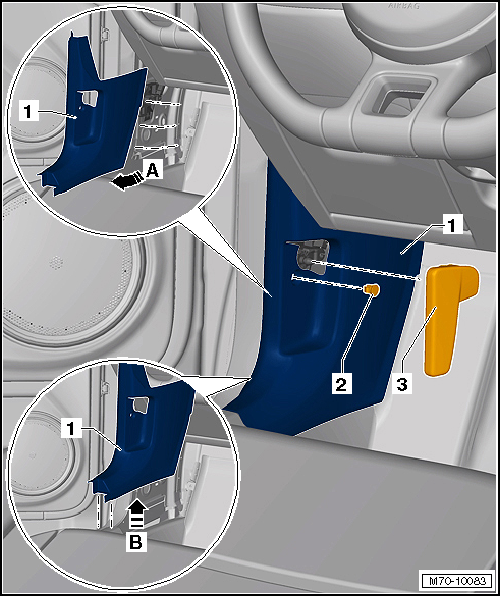
Remove bonnet operating lever -3-
→ General body repairs, exterior; Rep. gr.55. |
| – |
Release lower A-pillar trim -1- in
-direction of arrow B- from body. Release
lower A-pillar trim from door seal beading while doing so. |
| – |
Remove lower A-pillar trim -1- in
-direction of arrow A- from mounting. |
| Removing lower A-pillar trim on driver side, RHD vehicles |
| – |
Release sill panel moulding from body in area of overlap to lower
trim of A-pillar
→ Chapter. |
| – |
Remove A-pillar gap cover
→ Chapter. |
| – |
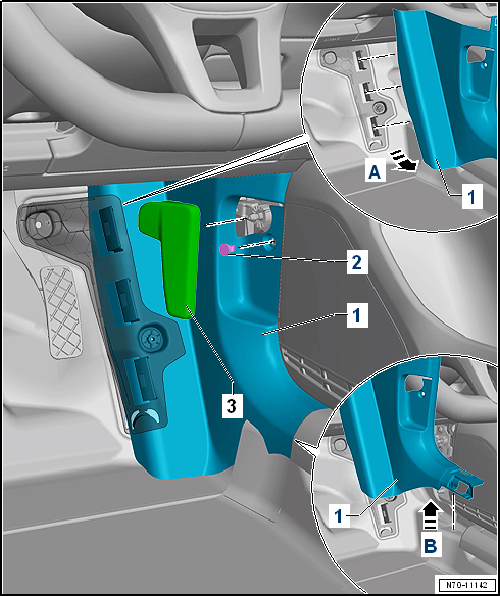
Remove bonnet operating lever -3-
→ General body repairs, exterior; Rep. gr.55. |
| – |
Unclip lower A-pillar trim -1- in
-direction of arrow A- from mountings. |
| – |
At the same time, release lower A-pillar trim
-1- in -direction of arrow B- from
body. Release lower A-pillar trim from door seal beading while doing so. |
| – |
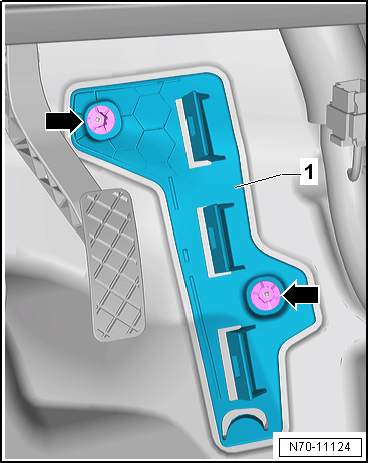
Push floor covering in area of bolted connections aside and
unscrew nuts -arrows-. |
| – |
Lift bracket -1- off studs and
pull it out from beneath floor covering. |
|
|
|
| Removing lower A-pillar trim on front passenger side |
| – |
Release sill panel moulding from body in area of overlap to lower
trim of A-pillar
→ Chapter. |
| – |
Remove A-pillar gap cover
→ Chapter. |
| – |
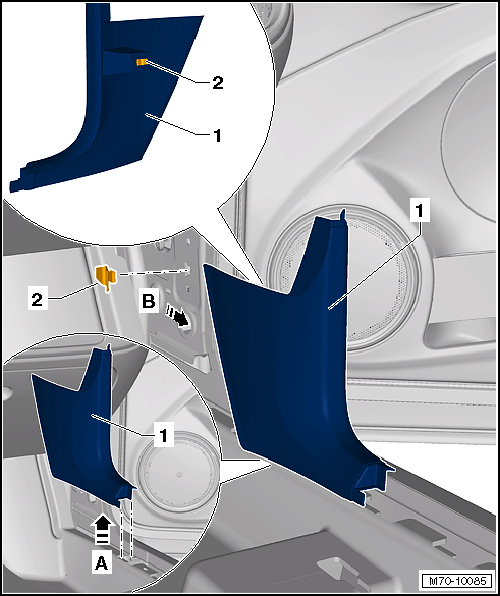
Release lower A-pillar trim -1- in
-direction of arrow A- from body. Release
lower A-pillar trim from door seal beading while doing so. |
| – |
Remove lower A-pillar trim -1- in
-direction of arrow B- from A-pillar. |
Note
-
| |
Before installing, check all fasteners for damage and
renew if necessary. |
-
| |
Remove any retaining clips left in body mountings
using removal tool -T40280- and fit them in A-pillar trims
for installation. |
-
| |
Following installation, ensure that the A-pillars
trim are positioned in door seal beading. |
| Installation is carried out in reverse order. |
| |
→ Chapter „Assembly overview - A-pillar trim“ |
|
|
|
Questions & answers
Removing and installing A-pillar trim — Volkswagen Golf Mk7
How do I remove the Golf Mk7 A-pillar trim?
Upper trim: use removal wedge -3409-, release clips upward. Lower trim: unbolt with torque wrench -V.A.G 1783-. Curtain airbag runs behind this trim — handle with care.
Note
Removal and installation are described for the left
vehicle side. Follow same instructions for the right side as
appropriate.
...
Special tools and workshop equipment
required
Wedges -T10383
&n ...

 Caution