Using torque wrench -V.A.G 1332-, this page covers removing the lower suspension link specifically on DSG 0D9-equipped Volkswagen Golf Mk7 models — the same wheel removal preparation.
| Special tools and workshop equipment
required |
|
|
|
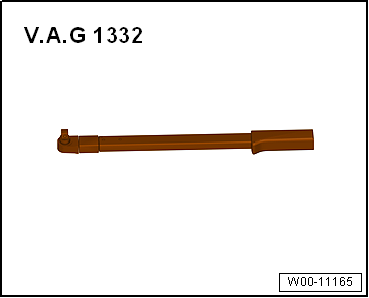
| Torque wrench -V.A.G 1332- |
| – |
If fitted, remove noise insulation
→ General body repairs, exterior; Rep. gr.66. |
| – |
Loosen double clamp of exhaust system
→ Rep. gr.26. |
|
|
|
| – |
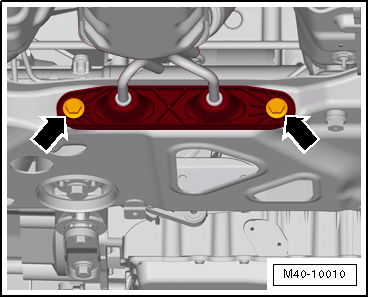
Detach exhaust system bracket from subframe
-arrows-. |
|
|
|
| – |
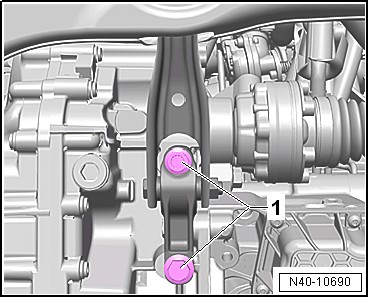
Remove bolts -1- for pendulum
support. |
| – |
Release rear area of wheel housing liner and fold it
forwards. |
|
|
|
| Vehicles with vehicle level sender |
| – |
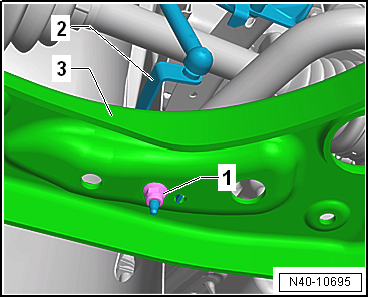
Pull bracket -2- for front left
vehicle level sender -G78- and/or for front right vehicle level
sender -G289- out of suspension link -3-,
as applicable |
| Continuation for all vehicles |
|
|
|
| – |
Pull suspension link out of swivel joint and turn wheel
bearing housing to outside to relieve suspension link. |
|
|
|
| – |
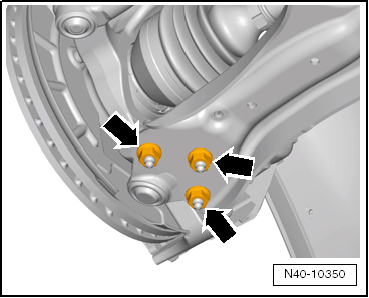
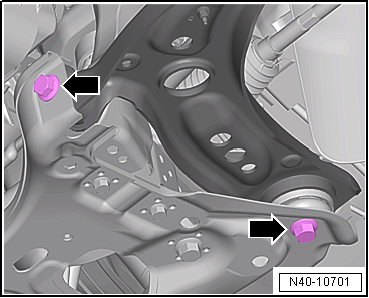
Unscrew bolts -arrows-.
Counterhold at rear bolt on nut at top while doing so. |
| – |
Press gearbox forwards until front bolt can be removed. When
pressing forwards, make sure that exhaust pipe on subframe does
not tilt. |
|
|
|
| – |
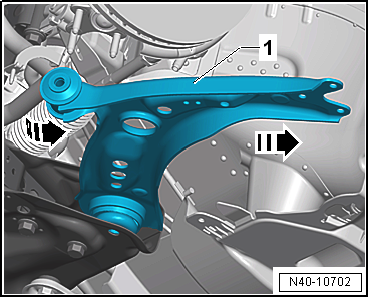
Swivel suspension link -1- to
rear and pull out of subframe in
-direction of arrow-. |
| Install in reverse order of removal, observing the
following: |
|
|
|
| – |
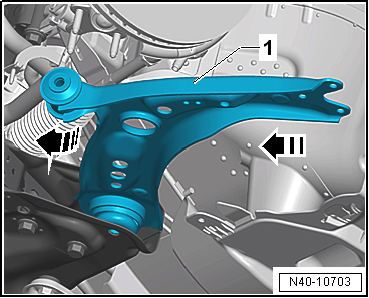
Insert rear suspension link -1-
into subframe in -direction of arrow-
and swivel forwards. |
 Note Note
| The rear bolt must be secured with a new nut. |
|
|
|
| – |
Tighten bolts -arrows-,
counterholding at rear bolt on nut at top. |
Note
| Lever on vehicle level sender must face towards outside of
vehicle. |
| Thread of vehicle level sender must be screwed into outer
hole in suspension link. Retaining lug for vehicle level sender
must engage in inner hole in order to guarantee correct
installation position. |
| – |
On vehicles with vehicle level sender, carry out basic
settings for wheel damper electronics → Vehicle
diagnostic tester. |
| → Chapter „Assembly overview - lower suspension link, swivel
joint“ |
| → Chapter „Assembly overview - front vehicle level senders“ |
| → Chapter „Torque settings for wheel bolts“ |
| Bolts for pendulum support
→ Rep. gr.10. |
| Bolts for noise insulation
→ General body repairs, exterior; Rep. gr.66. |
| Exhaust pipes double clamp
→ Rep. gr.26. |
| Exhaust system to subframe
→ Rep. gr.26. |
|
|
|
Questions & answers
Removing and installing lower suspension link, vehicle with dual clutch gearbox 0D9 — Volkswagen Golf Mk7
How does Golf Mk7 lower arm removal differ for DSG 0D9?
The 0D9 (6-speed wet-clutch DSG) has different drive shaft clearance. Procedure is similar but the arm may need to be angled differently for extraction.
Special tools and workshop equipment
required
Torque wrench -V.A.G 1332-
Removin ...
Checking axial play
–
Firmly pull suspension link down in
-direction of arrow- and press up again.
...


