 Note Note
| Removal and installation are described for the left vehicle
side. Follow same instructions for the right side as
appropriate. |
| Special tools and workshop equipment
required |
|
|
|
| |
|
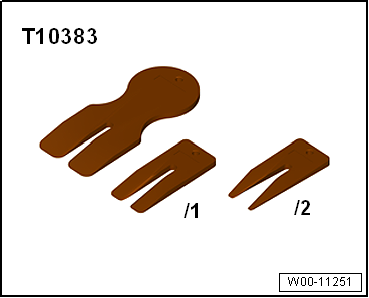
Wedges -T10383 |
| – |
Remove rear bench seat
→ Chapter. |
| – |
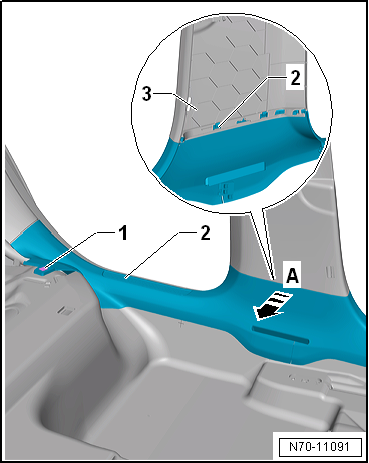
Remove spreader clip -1-. |
| – |
Release locking lugs of sill panel moulding
-2- from lower B-pillar trim
-3--arrow A- using wedge -T10383-. |
|
|
|
| – |
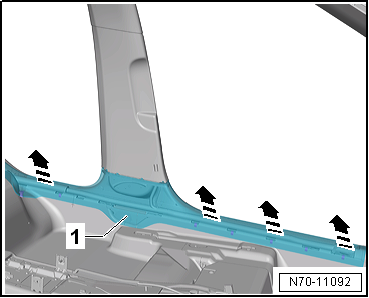
Release sill panel moulding -1-
from side member and beading of door seal
-arrows- using wedge -T10383-. |
| – |
At the same time, pull off sill panel moulding
-1- slightly towards front. |
| – |
Open cover for belt guide and thread out seat belt. |
| – |
Remove sill panel moulding. |
Note
-
| |
Before installing, check all fasteners for damage and
renew if necessary. |
-
| |
Remove any retaining clips left in body mountings
using removal tool -T40280- and fit them in sill panel
moulding for installation. |
-
| |
Following installation, ensure that the sill panel
moulding is positioned in the door seal beading. |
| Installation is carried out in reverse order. |
|
|
 |
Questions & answers
Removing and installing sill panel moulding, 4-door model — Volkswagen Golf Mk7
How do I remove the Golf Mk7 4-door sill panel moulding?
Left side described; right similar. Same clip release as 2-door but the moulding is longer.
Note
Removal and installation are described for the left
vehicle side. Follow same instructions for the right side as
appropriate.
...
Note
Removal and installation are described for the left
vehicle side. Follow same instructions for the right side as
appropriate.
...


