| Special tools and workshop equipment
required |
|
|
|
| |
|
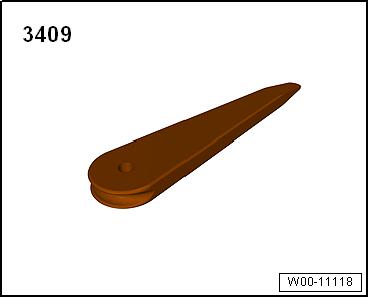
Removal wedge -3409- |
 Note Note
| The aid of a second mechanic is recommended on account of
restricted space in the area of the “trim for locking
mechanism”. |
| – |
Remove respective rear head restraint
→ Chapter. |
| – |
Using a screwdriver, detach beading strip on sides and on
top of backrest cover in area of trim from backrest. |
|
|
|
| – |
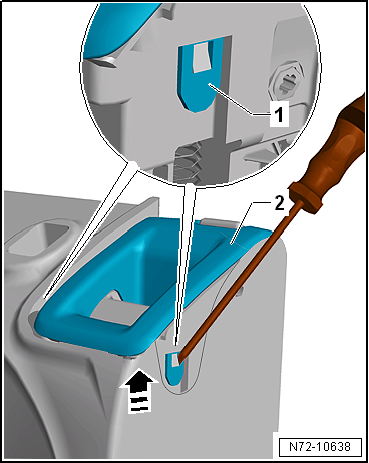
Using removal wedge -3409-, carefully push cover next to
trim -2- outwards. |
| – |
Using a light, determine position of respective locking tab
-1-. |
| – |
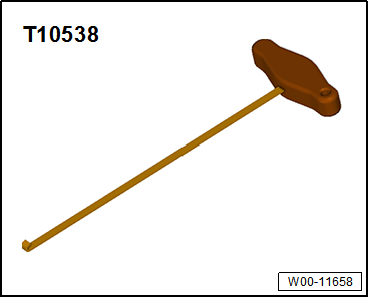
Using hook -T10538-, carefully bend respective locking tab
-1- outwards. |
| – |
After both locking tabs -1-
have been bent outwards, pull trim upwards
-arrow-, and remove it.
|
| Install in reverse order, but note the following: |
| – |
After the trim has been installed, the locking mechanism
must work smoothly. |
|
|
|
Questions & answers
Removing and installing trim for locking mechanism — Volkswagen Golf Mk7
How do I remove the Golf Mk7 rear seat locking mechanism trim?
Use removal wedge -3409- and hook -T10538-. A second mechanic is recommended to hold the backrest while the trim is unclipped.
Special tools and workshop equipment
required
Torque wrench -V.A.G 1331
...
Special tools and workshop equipment
required
Torque wrench -V.A.G 1331
...


