| Special tools and workshop equipment
required |
|
|
|
| |
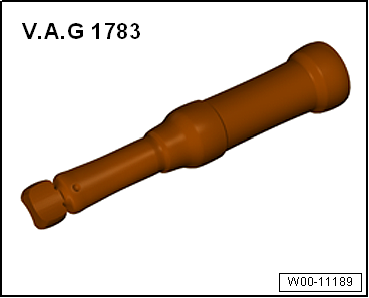
Torque wrench -V.A.G 1783- |
| – |
Remove centre console
→ Chapter. |
| – |
Move front seats as far back as possible. |
| – |
Disconnect battery earth cable
→ Electrical system; Rep. gr.27. |
| – |
Remove driver side airbag
→ Chapter. |
| – |
Remove steering wheel
→ Running gear, axles, steering; Rep. gr.48. |
| – |
Remove steering column switch module
→ Electrical system; Rep. gr.94. |
| – |
Remove light switch trim
→ Chapter. |
| – |
Remove dash panel cover on driver side
→ Chapter. |
| – |
Remove glove compartment
→ Chapter. |
| – |
Remove centre vent
→ Chapter. |
| – |
Remove dash panel insert
→ Electrical system; Rep. gr.90. |
| – |
Remove trim for display unit for front information display
and operating unit control unit -J685-
→ Communication; Rep. gr.91. |
| – |
Remove left and right trim for triangular window
→ Chapter. |
| – |
If fitted, remove sunlight penetration photosensor -G107-
→ Heating, air conditioning; Rep. gr.87. |
| – |
Disconnect connector for front passenger airbag
→ Chapter. |
|
|
|
| – |
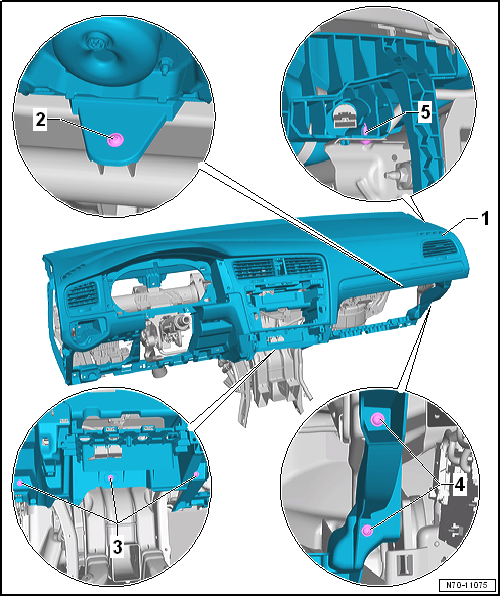
Unscrew bolt -2- securing dash panel
-1- to central tube on front passenger
side. |
| – |
Unscrew bolts -3- securing dash panel
-1- to central tube in middle. |
| – |
Unscrew bolts -4- and
-5- securing dash panel
-1- to central tube on right side. |
| – |
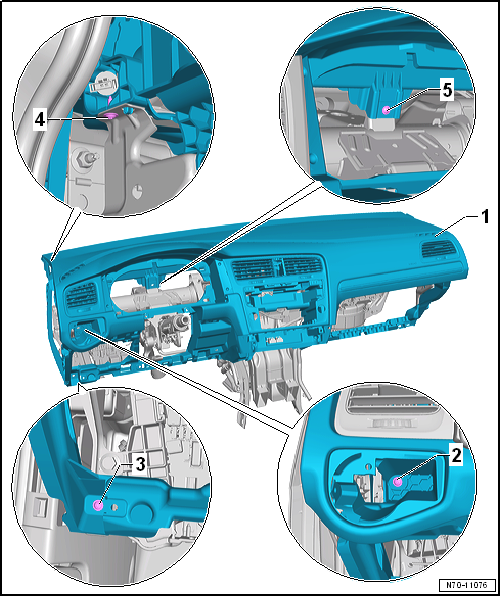
Unscrew bolts -2-,
-3- and -4-
securing dash panel -1- to central tube on
left side. |
| – |
Unscrew bolt -5- securing dash panel
-1- to central tube on driver side. |
| – |
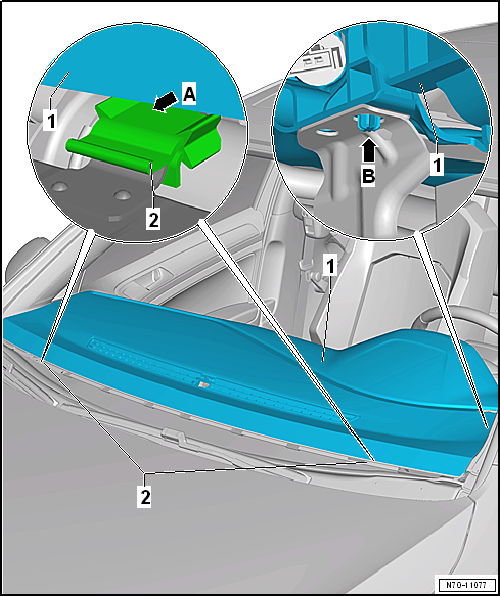
Lift up dash panel -1- until locating
lugs on left and right -arrow B- are
released from mountings. |
| – |
At the same time, pull dash panel -1-
out of mountings -2- in transitional area
to windscreen -arrow A-. |
 Note
Note
| The help of a second mechanic is required to remove the dash panel. |
| – |
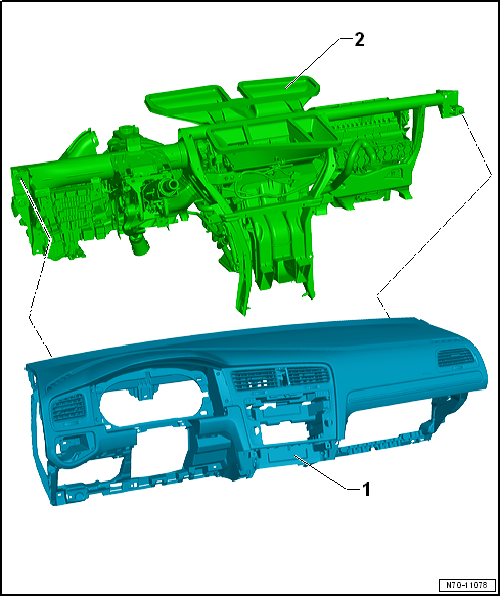
Remove dash panel -1- from dash panel
central tube -2-. |
| – |
Disconnect connectors and lay wiring harnesses on dash panel to one
side. |
| – |
Carefully remove dash panel from vehicle interior and place it on a
soft surface. |
Note
-
| |
Before installing, check all fasteners for damage and
renew if necessary. |
-
| |
When securing the dash panel, tighten bolts in
reverse order of removal. |
| Install in reverse order, but note the following: |
|
|
|
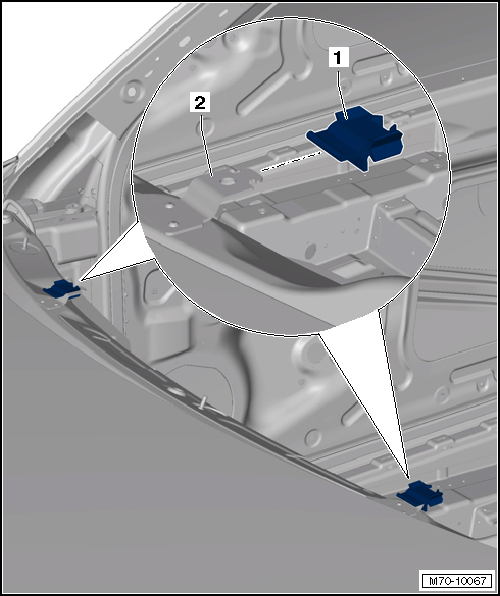
| – |
Before installing dash panel, check whether mountings
-1- are firmly attached to body
-2-. |
| – |
With the aid of a second mechanic position dash panel
-1- onto dash panel central tube
-2- so that a perfect fit is achieved. |
| – |
Insert dash panel -1- into mountings
-2- in transitional area to windscreen
-arrow A-. |
| – |
Insert locating lugs on left and right into mountings
-arrow B-. |
| |
→ Chapter „Assembly overview - dash panel“ |
|
|
|
Questions & answers
Removing and installing dash panel — Volkswagen Golf Mk7
How do I remove the entire Golf Mk7 dash panel?
Remove the centre console, move seats fully back, disconnect all electrical connections (instruments, airbags, climate, wiring), unbolt the dash panel central tube mountings and lift the panel out with an assistant.
Do I need to disable the Golf Mk7 airbags before removing the dash panel?
Yes. Disconnect the battery and wait the specified time before working near any airbag component. Follow all pyrotechnic safety instructions.
Special tools and workshop equipment
required
Removal wedge -3409
...
Special tools and workshop equipment
required
Front-end hook -3370
...


