 Note Note
| The illustration shows the B-pillar trims on the left side.
The right-hand side is similar (mirror image of left-hand side). |
|
|
|
| Upper part of B-pillar trim |
| I: Upper B-pillar trim, 4-door model |
| II: Upper B-pillar trim, 2-door model |
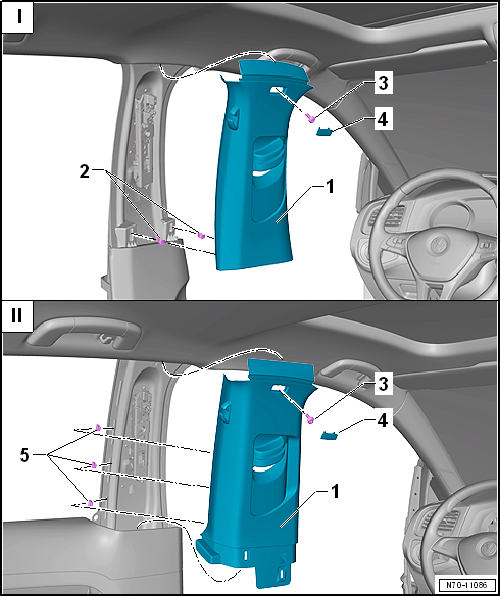
| 1 - |
Upper part of B-pillar trim |
- Removing and installing
→ Chapter
- Insert in upper B-pillar trim
- Renew any damaged or deformed retaining clips
- Insert in B-pillar trims.
- Renew any damaged or deformed retaining clips
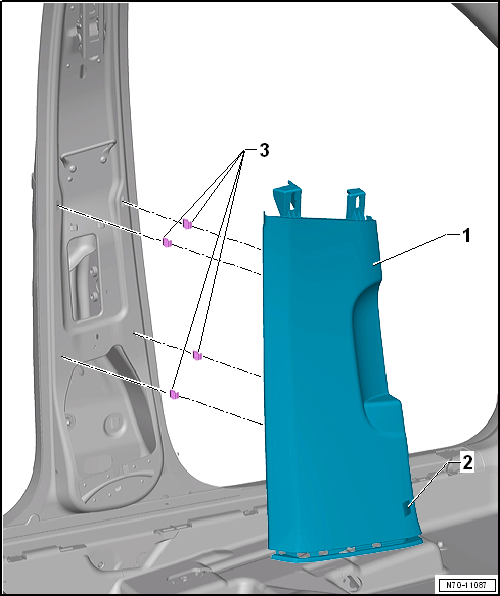
- Removing and installing
→ Chapter
| 2 - |
Button for deactivating interior monitoring and vehicle inclination
sensor -E616- |
- Removing and installing
→ Electrical system; Rep. gr.96
- Insert into trim
- Remove any retaining clips left in body mountings using removal tool
-T40280-
- Renew any damaged or deformed retaining clips.
Questions & answers
Assembly overview - B-pillar trim — Volkswagen Golf Mk7
What does the Golf Mk7 B-pillar trim assembly show?
Upper and lower B-pillar trims, belt height adjuster cover, seat belt guide and mounting hardware.
Note
The illustration shows the A-pillar trims on the left side.
The right-hand side is similar (mirror image of left-hand side).
...
Note
The illustration shows the D-pillar trim on the left side. The
right-hand side is similar (mirror image of left-hand side).
1 -
D-pillar tri ...


