| Special tools and workshop equipment
required |
|
|
|
 Note Note
| Removal and installation are described only for the left
cover. The right side is similar. |
|
|
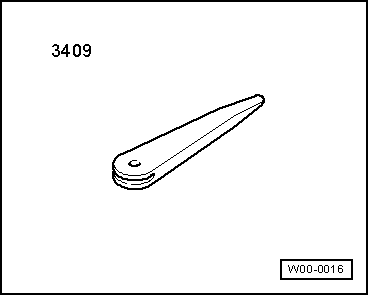
Removal wedge -3409- |
| – |
Remove front door trim
→ General body repairs, interior; Rep. gr.70. |
| – |
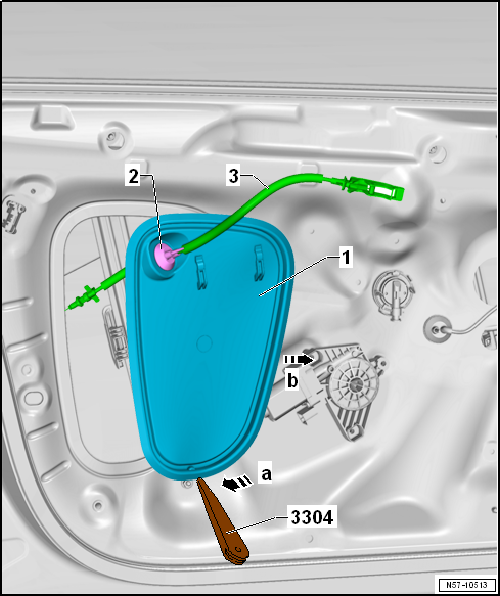
Lift lower end of cover -1--arrow a-. |
| – |
Pull cover -1- frontwards out of door
-arrow b-. |
Note
| If required for subsequent work, pull cable
-3- with grommet -2- out of cover
-1-. Separate connector at grommet (if
there is one). |
| – |
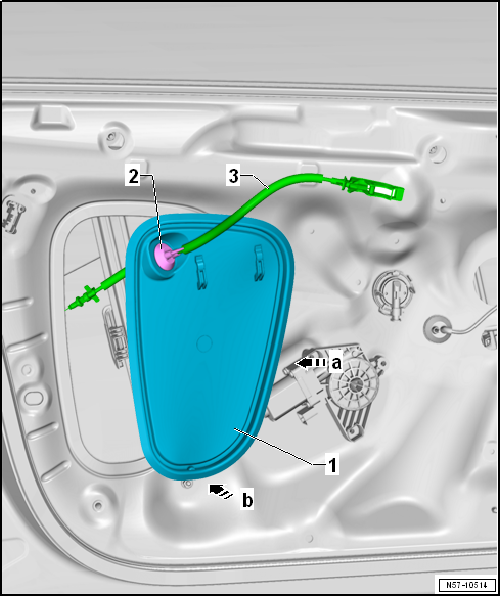
Fit cable -3- together with grommet
-2- into cover -1-. |
| – |
Attach grommet -2- to cover
-1-. |
| – |
Insert cover -1- into door
-2--arrow a-. |
| – |
Engage cover -1- around circumference
-arrow b-. |
Note
| Check proper seating of cover by pressing with fingers around
circumference. |
Questions & answers
Removing and installing inner door cover — Volkswagen Golf Mk7
How do I remove the Golf Mk7 front inner door cover?
Use removal wedge -3409- to release the clips. Remove the door trim panel first, then peel back the vapour barrier (protective film) and remove the inner cover.
What is the Golf Mk7 door vapour barrier?
A plastic film glued behind the door trim that prevents moisture from the door cavity entering the cabin. It must be refitted or replaced after any door work.
Special tools and workshop equipment
required
Note
Removal and ...
Special tools and workshop equipment
required
Torque wrench -V.A.G 1331-
...


